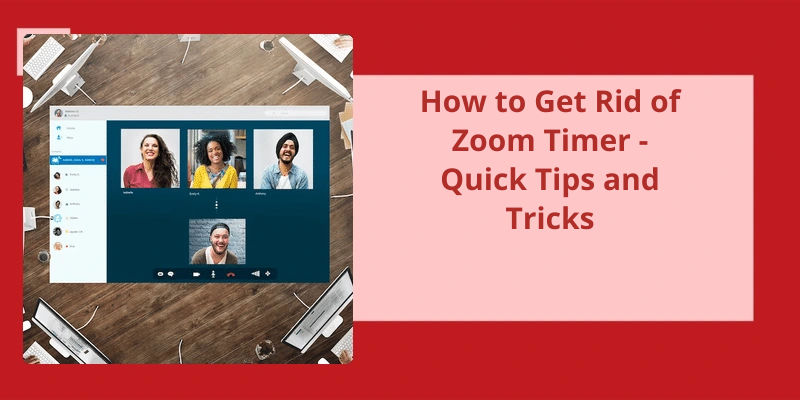
As video conferencing becomes essential for remote work, online education, and keeping in touch with loved ones, Zoom has emerged as one of the most popular applications. While it offers a range of useful features, the timer function can be an unwanted distraction during meetings or classes. Fortunately, removing the timer from Zoom is relatively easy and can be done within a few simple steps. By accessing the Zoom Marketplace and uninstalling the timer application, you can regain control of your time and focus on the conversation at hand. In this article, we will walk you through the steps to get rid of the Zoom timer and improve your productivity during video conferences.
How Do I Get Rid of the BlueSky Timer on Zoom?
If youre someone who frequently uses Zoom for any purpose, chances are that you may have come across the BlueSky timer app at some point. While this app was designed with the best intentions, with the purpose of ensuring that Zoom meetings don’t go overtime, it can often be a hindrance to your personal productivity and time management. If you find yourself feeling frustrated with the BlueSky timer app and are wondering how you can get rid of it, youre not alone.
It’s important to note that while the BlueSky timer app can be useful in certain situations, it may not be necessary or helpful for everyone. If you find that it’s not serving your needs, theres no harm in removing it altogether.
For example, you can try disabling the app through your Zoom settings. This will prevent it from functioning without uninstalling it completely, allowing you to maintain access to the app in case you decide to use it in the future.
With just a few clicks, you can wave goodbye to the interruptions and distractions that can sometimes come along with it, and enjoy a more streamlined Zoom experience that aligns with your unique needs and preferences.
Alternatives to the BlueSky Timer App for Time Management During Zoom Meetings.
- Focus@Will
- RescueTime
- Todoist
- Google Calendar
- Forest App
- Be Focused
- Pomodoro Timer
- Focus Booster
- Harvest Time Tracker
- Freedom
Removing the BlueSky Timer from your Zoom meeting can be a quick and easy process. Whether you no longer need it or simply find it distracting, you can remove it just like any other participant. Here’s how to remove it from both a normal meeting and a webinar.
How Do I Remove the Zoom Timer From My Blue Sky?
Zoom meetings have become a ubiquitous part of our digital lives, especially since the pandemic. One interesting feature of the platform is the BlueSky Timer, an add-on that helps meeting organizers keep track of time. Many people find this feature helpful, but there are some situations where it’s not needed or wanted. If youve decided to remove the BlueSky Timer from your Zoom meeting, there are a few simple steps you can follow.
It’s worth noting that the process is slightly different if youre trying to remove the Timer from a Zoom webinar. In this case, youll need to go to the Panelist tab, which contains a list of all the presenters in the webinar. Once youve found the BlueSky Timer on this list, follow the same steps as before to remove it from the webinar. Again, this should happen immediately and be reflected in the output for the webinar.
It’s also worth noting that participants might have the ability to install a BlueSky Timer independently, so it’s possible that it will still be present in some fashion even after youve removed it as the host. If this is the case, theres unfortunately not much you can do to force it’s removal from every participants view. However, if youre the host or a co-host, you can at least make sure that it’s not visible on the main screen for everyone to see.
It’s a small change, but it can help make your meeting feel more streamlined, especially if you find that the Timer is becoming distracting or unnecessary. Always make sure youre logged in as the host and follow the correct steps, and you should have no trouble removing it from your setup.
How to Customize the Zoom Timer Settings to Fit Different Meeting Types and Time Constraints
In this guide, we will explore how to customize the Zoom Timer settings to fit different meeting types and time constraints. This will enable you to better manage your Zoom meetings and ensure they run smoothly, regardless of their time limitations or format. We will cover how to adjust the countdown clock, set up multiple timers, and more.
Source: How do I remove the Timer from my meeting? – BlueSky
Now that you’re familiar with the basics of Zoom meetings, let’s dive into a specific feature that can help keep your meetings on track and productive: the meeting timer. With this feature enabled, you’ll be able to easily keep track of how long your meeting has been running, as well as how much time is left before the meeting ends. In this article, we’ll walk you through the steps for enabling the meeting timer in your Zoom meetings, so you can start making the most of this handy tool.
How Do I Show the Timer on My Zoom Meeting?
When conducting important meetings on the Zoom platform, it can be helpful to keep track of the time. This is especially true if you’ve a limited time frame in which to conduct the meeting, or if you need to ensure that everyone has a fair opportunity to speak. Fortunately, Zoom provides a simple way for you to show the timer on your screen during a meeting.
To make use of this feature, you’ll first need to sign in to the Zoom desktop client. Once you’ve done this, click on your profile picture in the top right-hand corner of the screen, and then click on the “Settings” option. This will bring up a new window with a tabbed interface.
Next, you’ll need to navigate to the “General” tab in the settings window. This can usually be found by default, but you can also use the search function to locate it more quickly. Once you’ve opened the General tab, scroll down until you find the option for “Show meeting timers”. This option will be located towards the bottom of the page, just above the “Language” section.
The timer will display the amount of time that’s passed since the meeting started, as well as the remaining time that’s available.
It’s worth noting that while the timer is visible to all participants in the meeting, only the host has the ability to start and stop the timer. This can be useful if you need to pause the meeting for any reason, or if you need to extend the amount of time available for discussion.
This easy-to-use feature will ensure that everyone stays on track and on time during your important meetings.
How to Customize the Timer Settings on Zoom
To customize the timer settings on Zoom, you can follow these steps:
1. Go to your Zoom desktop client and click on the ‘Settings’ gear icon
2. Click on the ‘In Meeting’ tab
3. Scroll down to the ‘Meeting Countdown’ section
4. Enable the countdown timer
5. Choose the duration for countdown timer
6. Save the changes you made.
With these steps, you can customize your timer settings on Zoom to suit your needs.
Aside from the features we’ve discussed in our previous article, Zoom also offers a countdown timer in breakout rooms. Enabling this feature makes it easier to manage time during group discussions or activities. Let’s take a closer look at how this feature works.
What Is the Countdown Timer in Zoom Breakout Rooms?
Zoom is a popular web-based video conference tool that’s become a go-to platform for virtual communication. With it’s many features and capabilities, Zoom has enabled people from various corners of the world to stay connected during the COVID-19 pandemic. One of these features is the breakout rooms – a feature that’s definitely come in handy for virtual team-building sessions, workshops, and classes.
Breakout rooms are a Zoom feature that allows a host to create smaller groups out of a larger meeting. Participants can be divided into separate virtual rooms where they can collaborate on a given task, discuss a topic, or engage in team-building activities, among others. After a designated amount of time, the breakout rooms will close and participants will automatically be returned to the main session.
If you intend to use breakout rooms for your Zoom meeting, enabling the countdown timer will allow participants to keep track of how much time is left while in the breakout room. This way, everyone can keep tabs on their progress and ensure that theyre on schedule. The timer will be visible to everyone in the breakout room, so it’s a great way to ensure that everyone is on the same page and can remain productive.
You can enable the countdown timer by accessing the breakout room settings. Make sure that youve enabled the option to allow participants to move freely between breakout rooms before doing this. Once enabled, all participants will see the timer on their screens once theyve entered the breakout room. It’s important to note that the timer doesn’t stop once a participant leaves the breakout room.
Whether youre hosting a virtual team-building session or an online class, the timer will help to keep everyone on track. To enable it, simply access the breakout room settings before starting your meeting.
Now that we know the limitations of a free Zoom account, let’s explore some ways to get past the Zoom time limit and make the most out of your virtual meetings. Whether you’re using Zoom for work, school, or personal use, there are several options available to help you extend your meeting time without having to upgrade to a paid account.
How Do I Get Past Zoom Time Limit?
But what if you don’t want to pay for a Zoom Pro account? Is there any way to get past the 40-minute limit on a free Zoom account? The answer is yes, but it requires a little bit of effort and creativity.
One option is to simply end the meeting when the 40-minute limit is up and immediately start a new one. This can be a bit of a hassle, especially if you’ve a large group of participants who need to join each time, but it’s a simple workaround that doesn’t require any special tools or skills.
Another option is to use a third-party app or service that can help you extend your Zoom meetings. There are several such services available, both free and paid, that can help you get past the 40-minute limit. These apps work by automatically reconnecting you to the meeting after it’s ended and creating a new session, so you can continue your conversation without interruption.
If none of these options work for you, there’s one more option to consider: ask your group to switch to another video conferencing platform that doesn’t have any time limits. There are several alternatives to Zoom available, including Skype, Google Meet, and Microsoft Teams, among others.
Whether you choose to upgrade to Zoom Pro, use a third-party app or service, switch to the web client, or switch to another platform altogether, the key is to find the solution that works best for your needs and budget. With a little bit of effort and creativity, you can continue to hold your group meetings and conversations without interruption.
Conclusion
From there, locate the Timer app and hit the Remove button. By following these simple steps, you can get rid of the Zoom timer and enjoy uninterrupted video calls without any unnecessary interruptions or disruptions. So, don't wait any longer and remove the Zoom timer today to make your virtual meetings more efficient and productive.